Any other children of the 80's with a certain song stuck in their brains right now?
Remember the scene... she's dancing like she never danced before... sweat pouring off her... a force of physical power pushing through the pain to be the best...
Now, imagine me at my sewing machine.
Stop laughing.
Stop! It's true! I'm a sewing maniac lately.
I made a queen size quilt for my son, a full size quilt for my daughter, finished a lap blanket, made a table runner and a Christmas quilt. I started on a full size quilt called Cabin in the Woods and have also started a ragged edge charity quilt.
See? Maniac.
Check out the charity work. It's for a super important cause - a friend in need of a double lung transplant. If you don't want to purchase a blanket, please consider making a donation to her surgical fund. Even a few extra bucks would be greatly appreciated.
Showing posts with label crafty. Show all posts
Showing posts with label crafty. Show all posts
Friday, October 15, 2010


Sunday, February 15, 2009
Crafty things I'd like to make
Friday, January 9, 2009
A la Moda

It arrived today! My Moda charm pack arrived.
I have no idea what to make with it.
Now I'm feeling intimidated. These are some great fabrics and I want to really show them off. Hrm. I'll have to think about this for a bit.
Any suggestions? Any quilt patterns you could suggest? I have 36 5" squares; one of each fabric in the picture.
Saturday, January 3, 2009
Not sew busy
**insert sad face here**
I've not been doing any sewing lately. My machine broke (it's fixed now, no need to panic!) and my back has been acting up again. I see the chiropractor, Dr. Magic Hands, first thing Monday morning. I'm practically counting the minutes.
Once I'm on the mend (translation: the adjustment should have me feeling almost normal by noon or so), I have a lot of sewing to finish!
And that makes me happy.
I never, ever thought I'd learn to sew -- let alone enjoy it! But I've made peace with the sewing machine. I'm learning new things about myself and my abilities. And I'm really enjoying my projects. I don't think I'll ever be an amazing seamstress of garments like my aunt and mom are, but I've found my little niche' and I'm happy with it.
 I think the thing I like the most about sewing is that it makes me feel close to my grandmother. She could sew anything! She was my best friend and I miss her dearly. When I'm sewing, especially the quilts because she loved her quilts, I feel like I'm carrying on a little bit of the heritage she left us. I'll never be an amazing gardener like she and my grandfather were, but it comforts me to sew and think about her and how excited she'd be to see my projects.
So, back to the chiropractor and back to sewing!
I've not been doing any sewing lately. My machine broke (it's fixed now, no need to panic!) and my back has been acting up again. I see the chiropractor, Dr. Magic Hands, first thing Monday morning. I'm practically counting the minutes.
Once I'm on the mend (translation: the adjustment should have me feeling almost normal by noon or so), I have a lot of sewing to finish!
Yes, I have a lot of sewing to do.
- finish my aunt's ragged edge Christmas quilt
- cut and sew my mom's Christmas present (are you sensing a theme here?)
- make an apron for a friend (it's cut already)
- make a recycled bag (from plastic Target bags!) for a friend
- make a quilted knitting needle roll for a friend
- start cutting squares to make my son a ragged edge quilt using the materials my mom used to sew his crib set. But I'm not sure I want to make it a ragged edge. I'm indecisive about the pattern.
- Try to make one-piece pj's for the kids - from scratch with no pattern. Meep!!
And that makes me happy.
I never, ever thought I'd learn to sew -- let alone enjoy it! But I've made peace with the sewing machine. I'm learning new things about myself and my abilities. And I'm really enjoying my projects. I don't think I'll ever be an amazing seamstress of garments like my aunt and mom are, but I've found my little niche' and I'm happy with it.
I think the thing I like the most about sewing is that it makes me feel close to my grandmother. She could sew anything! She was my best friend and I miss her dearly. When I'm sewing, especially the quilts because she loved her quilts, I feel like I'm carrying on a little bit of the heritage she left us. I'll never be an amazing gardener like she and my grandfather were, but it comforts me to sew and think about her and how excited she'd be to see my projects.So, back to the chiropractor and back to sewing!
Monday, December 22, 2008
I have been sucked in...
Into the world of quilting!!
I really enjoy making them - even as rudimentary as my first few projects have been.
I just found a bunch of I Love Lucy material. My sister-in-law loves ILL and collects the memorabilia. I know she'd love a bag or a quilt with this material. I might make her a simple ragged edge quilt with it since it seems pretty easy. Yes, I'm already working on presents for next Christmas.
I have spent the past few days exploring blogs and quilting websites. It's a bit overwhelming but so very inspiring.
I really enjoy making them - even as rudimentary as my first few projects have been.
I just found a bunch of I Love Lucy material. My sister-in-law loves ILL and collects the memorabilia. I know she'd love a bag or a quilt with this material. I might make her a simple ragged edge quilt with it since it seems pretty easy. Yes, I'm already working on presents for next Christmas.
I have spent the past few days exploring blogs and quilting websites. It's a bit overwhelming but so very inspiring.
Wednesday, December 17, 2008
Tote Part 2
I finished the tote today! I only had one misstep and it was easily corrected. I'm so stinkin' proud of this bag!
When we last left our hero....
Yesterday, I was able to create half of the diamond quilting pattern. Today, I purchased a fabric pen and marked the other half. I finished quilting the first side of the bag, then layered my second side of the bag and completely quilted it.
I must say, having a two inch wide ruler and a fabric pen makes a world of a difference. SO much easier than last night's moving-tape-fiasco!

Next, you can either finish the bottom or the top. We'll start with the bottom.
Lay your front and back pieces on top of each other right sides (outer material) facing, trim your excess. Pin them together along the sides. Now, go to the bottom corners and cut out a two-inch square from each corner. This will be the base for the bottom of the bag. Because this bag is so large, I cut out a three-inch square.

With your layers still flat, sew the bottom, remaining as close to the edge as you can. We'll finish the bottom of the bag in just a moment.
Using quilting binding, finish the top edges of the bag. Leave a little extra hanging off the edges.

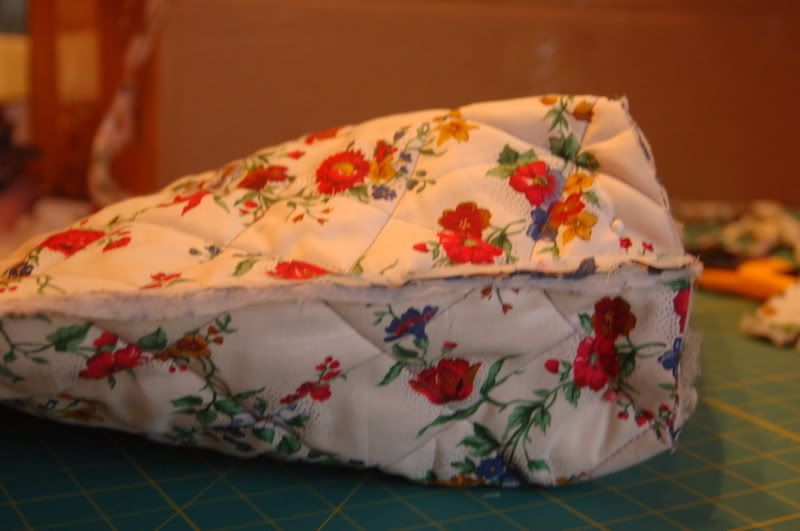
Now sew down the sides of the bag. When you're done, clip off the excess quilting binding. Remember to sew as close to the edge as you can. When you're done, it will look like this:

Now that the sides are assembled, we'll finish the bottom of the bag. Press the bottom of the bag "up and in" so it actually looks like the bottom of the bag. As you do this, you'll see the cut-out square edges pull together and touch each other. Pen and sew. This makes the bottom corner of your bag.

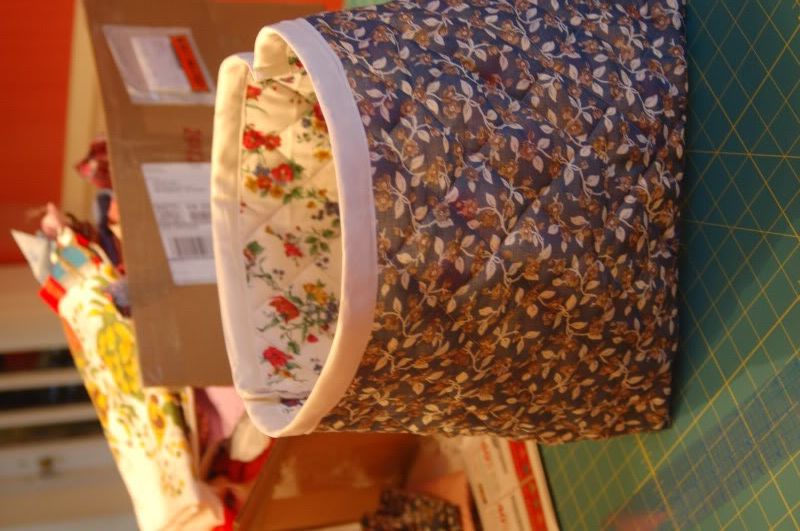
Turn the bag right-side out... voila'!

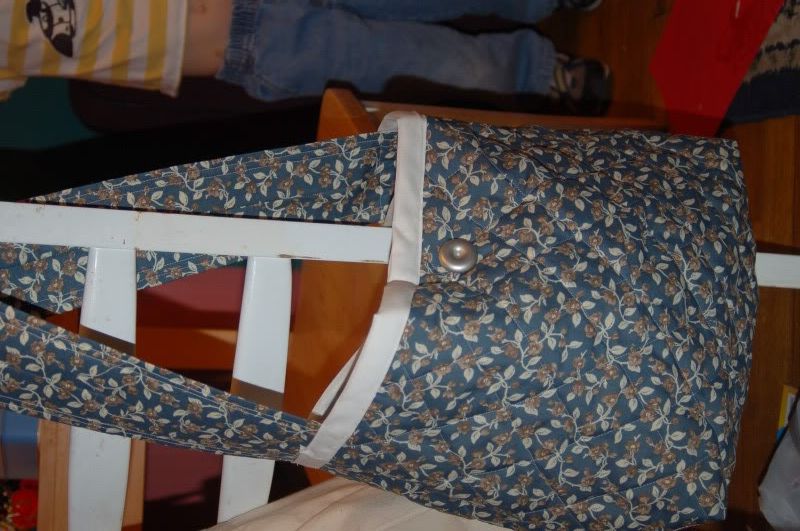
To finish the bag, sew a strap and add a button and button hole.

When we last left our hero....
Yesterday, I was able to create half of the diamond quilting pattern. Today, I purchased a fabric pen and marked the other half. I finished quilting the first side of the bag, then layered my second side of the bag and completely quilted it.
I must say, having a two inch wide ruler and a fabric pen makes a world of a difference. SO much easier than last night's moving-tape-fiasco!
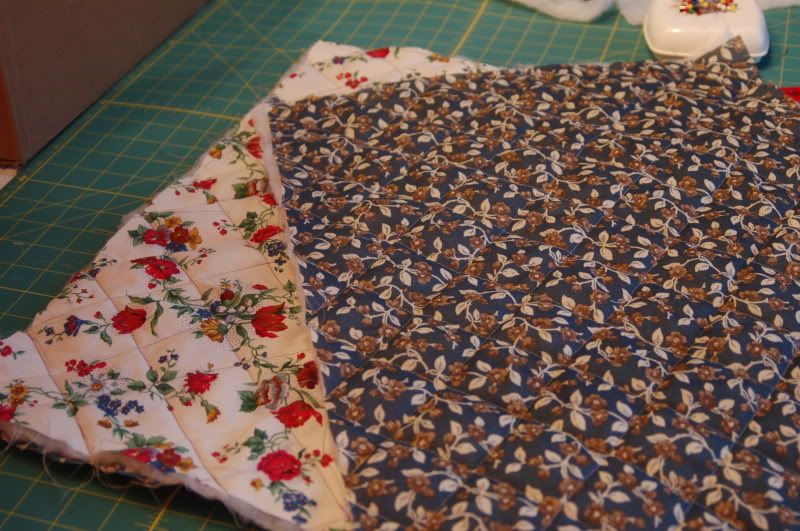
Next, you can either finish the bottom or the top. We'll start with the bottom.
Lay your front and back pieces on top of each other right sides (outer material) facing, trim your excess. Pin them together along the sides. Now, go to the bottom corners and cut out a two-inch square from each corner. This will be the base for the bottom of the bag. Because this bag is so large, I cut out a three-inch square.
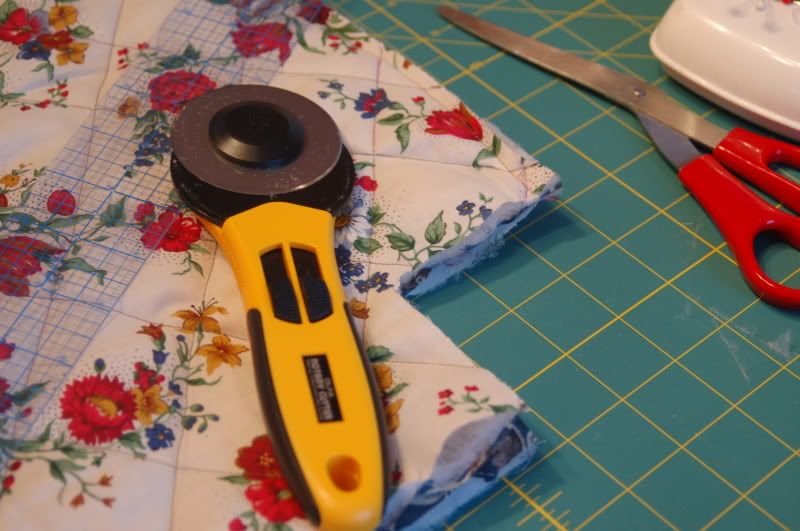
With your layers still flat, sew the bottom, remaining as close to the edge as you can. We'll finish the bottom of the bag in just a moment.
Using quilting binding, finish the top edges of the bag. Leave a little extra hanging off the edges.
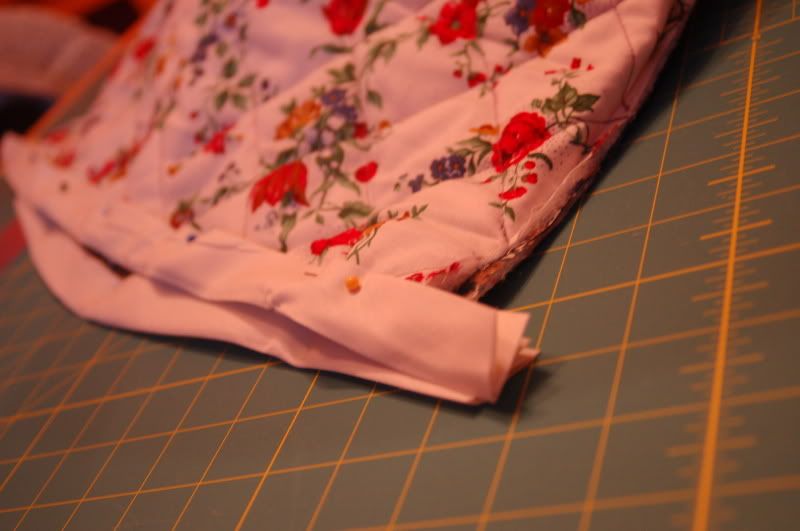
Now sew down the sides of the bag. When you're done, clip off the excess quilting binding. Remember to sew as close to the edge as you can. When you're done, it will look like this:
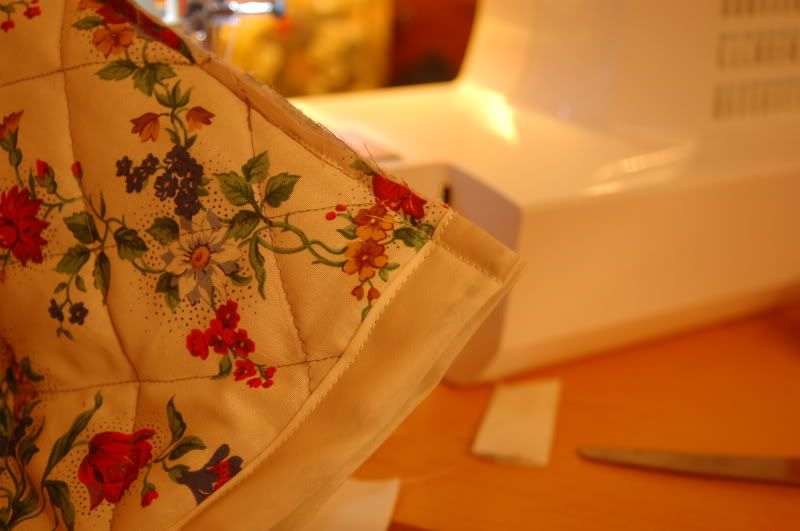
Now that the sides are assembled, we'll finish the bottom of the bag. Press the bottom of the bag "up and in" so it actually looks like the bottom of the bag. As you do this, you'll see the cut-out square edges pull together and touch each other. Pen and sew. This makes the bottom corner of your bag.
Turn the bag right-side out... voila'!
To finish the bag, sew a strap and add a button and button hole.
Tuesday, December 16, 2008
Moving tape for... quilting? Tote Part 1
Tonight, I embarked on yet another new sewing project - a quilted tote bag/purse. My good friend Stephanie made one this morning before my very eyes..... and I was impressed. Impressed enough to copy her! I really appreciated her help and instruction; she got me excited about quilting and made it look so easy. She's slick like that. I came home and decided to make a tote for my mother-in-law for Christmas. I'll take you through it step by step.
After ironing my fabric, I cut four rectangles the same size. Actual dimensions don't really matter, but it needs to be large enough to hold a wallet and a few other things. I cut two rectangles of two different materials. Then I cut two pieces of batting the same size as my fabric. I can now make a quilt sandwich: layer my materials wrong side up, batting, right side up.

I had to use two pieces of batting. I'm hoping it doesn't make my quilting too lumpy.
Well. Lumpier than it will already be. I have lump issues.
Okay. After the layering, I pinned all the way around the edges, smoothing the material as I went to try to eliminate lumpy shenanigans. Then, things got a bit wacky.
See, at 2am this morning, my daughter woke up and wouldn't go back to sleep. During the hours of 2 and 5 am, I spent a lot of time clicking around the internet. I was researching quilting and looking for tips and tricks. Tonight, I realized that without some ingenious thinking, I would be at a standstill. My fabric pencils were worn down and we don't have a pencil sharpener. The fabric pen I swiped from my mother's house is out of ink. I was using my kids' sidewalk chalk but it's so bulky and doesn't give a precise line. Then all that internet clicking at 3:30 in the morning paid off!
Someone, somewhere posted that she used painter's tape to mark her quilting lines. Painter's tape is two inches across so it would work as a great guide.
I pulled out my handy, dandy moving tape gun and got to work.

It worked pretty well! It wasn't as easy to stay precise and straight as marking with pencil would have been, but desperate times and all that...
It was easy to pull the tape off and it provided a decent guide. But I'll still be heading to the store tomorrow to get a pencil sharpener and some more pens.
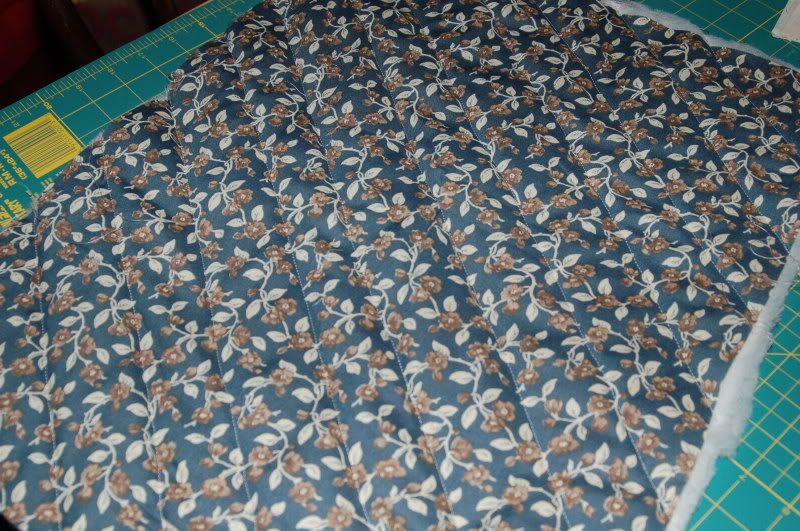
Here's the finished quilting. It's almost midnight and I'm sure my daughter will be waking me up in a few hours so I'll do the other fabric sandwich tomorrow.


After ironing my fabric, I cut four rectangles the same size. Actual dimensions don't really matter, but it needs to be large enough to hold a wallet and a few other things. I cut two rectangles of two different materials. Then I cut two pieces of batting the same size as my fabric. I can now make a quilt sandwich: layer my materials wrong side up, batting, right side up.

I had to use two pieces of batting. I'm hoping it doesn't make my quilting too lumpy.
Well. Lumpier than it will already be. I have lump issues.
Okay. After the layering, I pinned all the way around the edges, smoothing the material as I went to try to eliminate lumpy shenanigans. Then, things got a bit wacky.
See, at 2am this morning, my daughter woke up and wouldn't go back to sleep. During the hours of 2 and 5 am, I spent a lot of time clicking around the internet. I was researching quilting and looking for tips and tricks. Tonight, I realized that without some ingenious thinking, I would be at a standstill. My fabric pencils were worn down and we don't have a pencil sharpener. The fabric pen I swiped from my mother's house is out of ink. I was using my kids' sidewalk chalk but it's so bulky and doesn't give a precise line. Then all that internet clicking at 3:30 in the morning paid off!
Someone, somewhere posted that she used painter's tape to mark her quilting lines. Painter's tape is two inches across so it would work as a great guide.
I pulled out my handy, dandy moving tape gun and got to work.
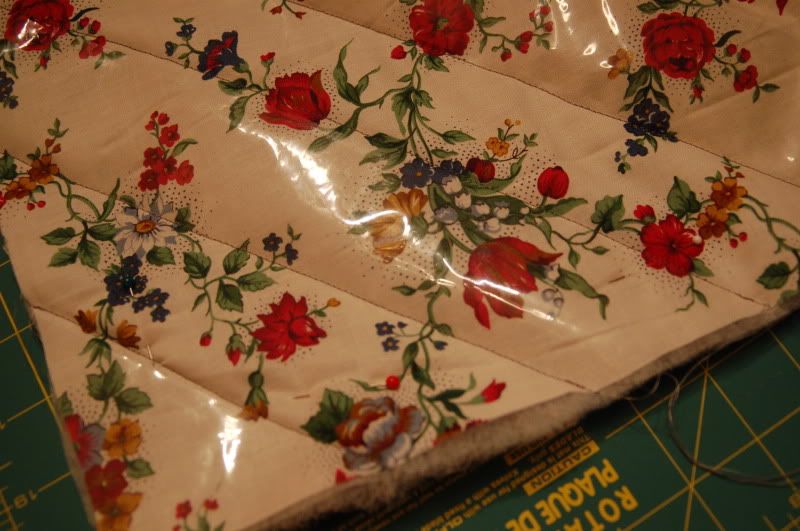
It worked pretty well! It wasn't as easy to stay precise and straight as marking with pencil would have been, but desperate times and all that...
It was easy to pull the tape off and it provided a decent guide. But I'll still be heading to the store tomorrow to get a pencil sharpener and some more pens.
Here's the finished quilting. It's almost midnight and I'm sure my daughter will be waking me up in a few hours so I'll do the other fabric sandwich tomorrow.

Tuesday, December 9, 2008
It's finished!
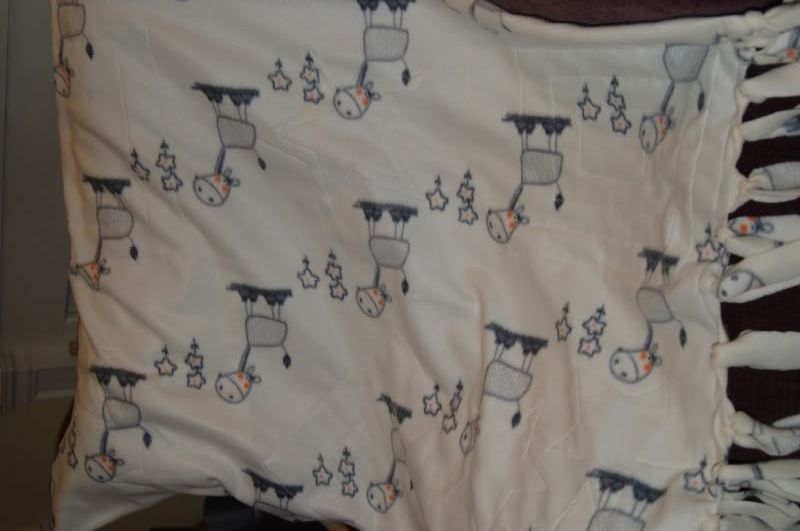
I finished the lap blanket for my grandfather. It's so cozy! I know he's going to love it!


A quilting we will go....
Tonight, I started my first ever quilt.
Don't start to be impressed. It was the simplest quilt ever.
I purchased some polar fleece on sale and decided to make a lap quilt for my grandfather for Christmas. I had some fat quarters that worked perfectly. I sewed the quarters so that I had two across and three down. Then I attached the patchwork of fat quarters to the fleece, sewed three sides and turned it inside out. That's as far as I got before my back started hurting again.
Tomorrow I'll iron it flat, close the fourth side and start stitching the two pieces together all fancy-like. I probably should have put some batting in it, but because it's fleece I figured it would be warm enough.
I'll post pictures when it's complete.
Don't start to be impressed. It was the simplest quilt ever.
I purchased some polar fleece on sale and decided to make a lap quilt for my grandfather for Christmas. I had some fat quarters that worked perfectly. I sewed the quarters so that I had two across and three down. Then I attached the patchwork of fat quarters to the fleece, sewed three sides and turned it inside out. That's as far as I got before my back started hurting again.
Tomorrow I'll iron it flat, close the fourth side and start stitching the two pieces together all fancy-like. I probably should have put some batting in it, but because it's fleece I figured it would be warm enough.
I'll post pictures when it's complete.
Friday, November 28, 2008
From rags ....er remnants... to... a skirt!
We went to my parent's house for Thanksgiving. While there, my mom dug a bunch of leftover material out of the crawlspace and gave it to me for sewing. In that big pile, I found some really cute, coordinating heart materials. There was just enough to make a super cute skirt for Shaggy.

I doubled the striped material since it was pretty lightweight. I only sewed one seam in the back to make a very wide tube. I cut two long strips of the coordinating heart material, hemmed it, then basted it to make a ruffle. I sewed the ruffle to the bottom of the skirt, created a casing for the elastic waistband and... voila! A super cute Valentine's twirly skirt!

And no pattern!! Even my mother was impressed! LOL

I doubled the striped material since it was pretty lightweight. I only sewed one seam in the back to make a very wide tube. I cut two long strips of the coordinating heart material, hemmed it, then basted it to make a ruffle. I sewed the ruffle to the bottom of the skirt, created a casing for the elastic waistband and... voila! A super cute Valentine's twirly skirt!

And no pattern!! Even my mother was impressed! LOL
Wednesday, October 22, 2008
oy!
The kids are supposed to attend a local "trunk or treat" on Saturday.
I haven't even cut out the material for their costumes yet!
OY!!!!!
I haven't even cut out the material for their costumes yet!
OY!!!!!
Saturday, September 20, 2008
Fat quarters and jelly rolls
No, this isn't the latest fad diet from Hollywood.
Nor is this a post about desserts... or weight loss... or spare change.
It's quilting. I know. It's very perplexing!
Evidently, these are precut sizes of material used for piece quilting. A Fat is half a yard of material cut in half. A jelly roll is a roll of strips and looks like this:

I'd really like to try making some small lap quilts as Christmas presents - or even table runners - but I am so confused by all the jargon. Can anyone point me to some easy tutorials?
Oh, and I think there are "charms" too, but they aren't like the charms on a bracelet. I have no idea what they are except they aren't what you think they are. LOL
Nor is this a post about desserts... or weight loss... or spare change.
It's quilting. I know. It's very perplexing!
Evidently, these are precut sizes of material used for piece quilting. A Fat is half a yard of material cut in half. A jelly roll is a roll of strips and looks like this:

I'd really like to try making some small lap quilts as Christmas presents - or even table runners - but I am so confused by all the jargon. Can anyone point me to some easy tutorials?
Oh, and I think there are "charms" too, but they aren't like the charms on a bracelet. I have no idea what they are except they aren't what you think they are. LOL
Thursday, September 18, 2008
More sewing!
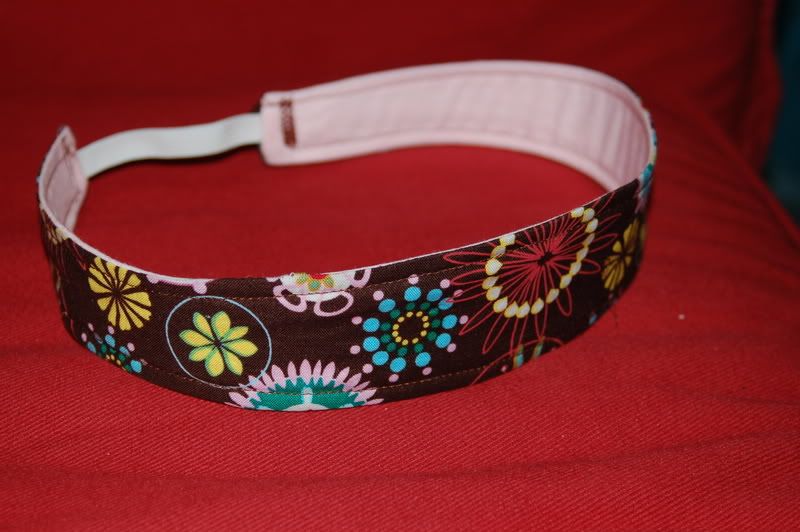
I found a great pattern for headbands. I've been wanting to make some for Shaggy since her hair is always in her face.
My first attempt wasn't so great. I tried again tonight and had much better success. I made it adult size but it won't stay on my head (but most headbands don't) so I'll have a friend try it out tomorrow.

My first attempt wasn't so great. I tried again tonight and had much better success. I made it adult size but it won't stay on my head (but most headbands don't) so I'll have a friend try it out tomorrow.
Tuesday, September 16, 2008
Well, huh. That's interesting!
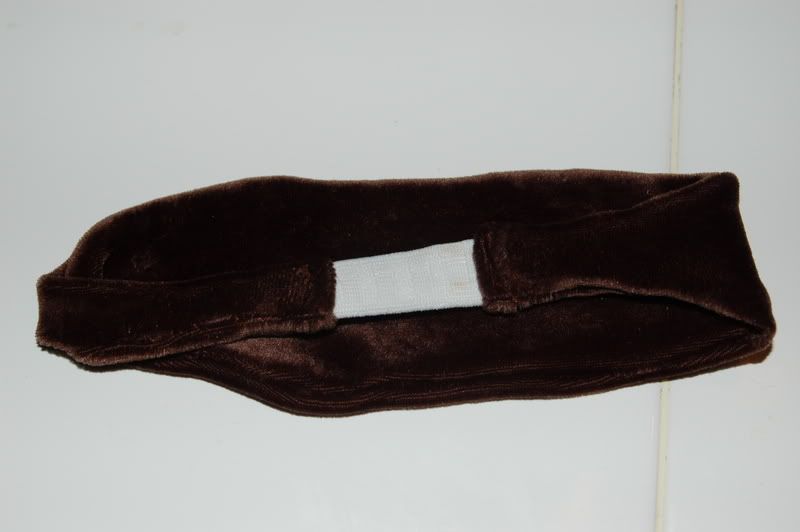
I grabbed a velor shirt I got for free at a clothing swap, cut out the side seams, folded it properly and laid down a pattern.... for a headband!
Now, the velor... Man that was a mistake! That material curls and slides so much! As a result, I have a very, very lopsided headband. It kept sliding as it went under the sewing machine foot.
I used an online pattern (but I can't find it right now but I'll try to add it later and then sized it down to fit Shaggy as I assembled it. I think it's a bit too tight. Darn, I'll just have to make more of them! LOL


Edited to add: Here's what the headband is supposed to look like: http://foofanagle.wordpress.com/2007/06/12/best-band-ever/
Now, the velor... Man that was a mistake! That material curls and slides so much! As a result, I have a very, very lopsided headband. It kept sliding as it went under the sewing machine foot.
I used an online pattern (but I can't find it right now but I'll try to add it later and then sized it down to fit Shaggy as I assembled it. I think it's a bit too tight. Darn, I'll just have to make more of them! LOL
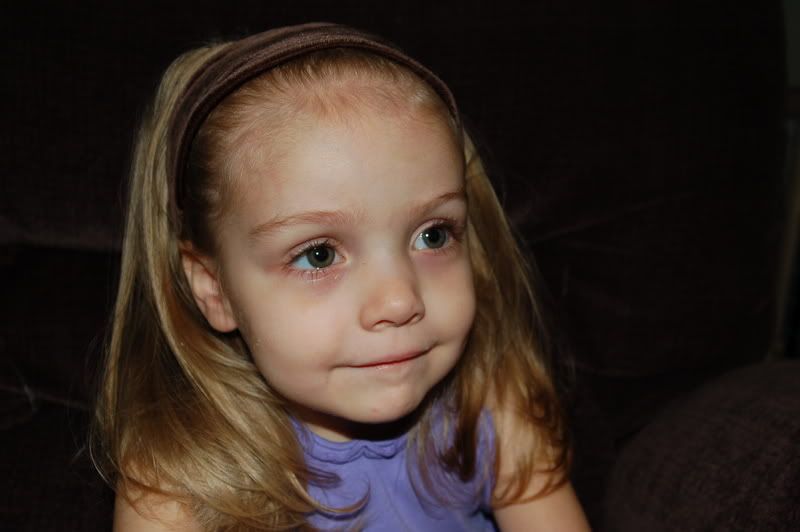
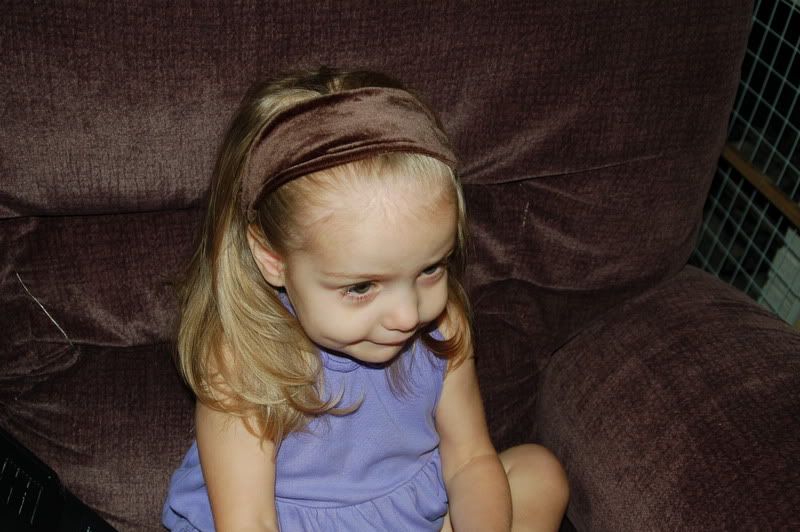

Edited to add: Here's what the headband is supposed to look like: http://foofanagle.wordpress.com/2007/06/12/best-band-ever/
Wednesday, September 3, 2008
The PJs... again..
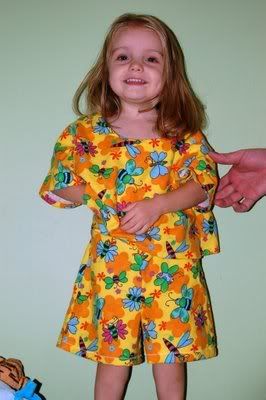
Here they are on Shaggy! They top is too large, but I had a feeling it would be based on the pattern's sizing. It looks a bit "Fame" on her. She was so tickled when she saw her "bumble bee and butterfly" pajamas.
In which I impress even myself...
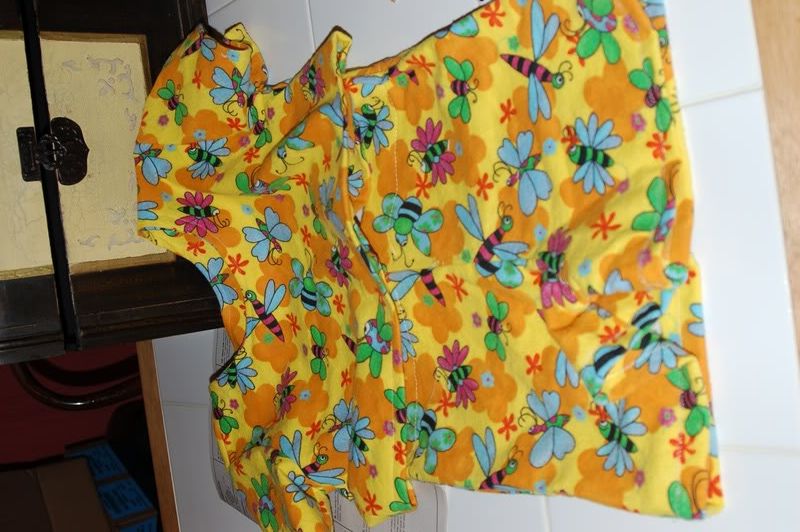
*I* made these shorts pajamas for Shaggy. That's right, *I* MADE THEM!!! A good friend helped me figure out the shorts and I did the entire top all by myself tonight.
I already have the shorts for Little M's pj's done. Tomorrow night, I'll make his shirt.
Sunday, August 31, 2008
My personal little shop of horrors
Also known as SEWING TIME!!
I recently purchased a used sewing machine. I then ventured into the fabric store and picked up a cute pajama pattern as well as material for the kids.
You need to understand that sewing scares the .... the... the.... well, it scares the poop outta me. It's very intimidating. I'm not good at spacial relations. It's really hard for me to layout the pattern and then match up the pieces. Add to that the pressure of descending from amazing seamstresses and you'll see me on the verge of a panic attack as I contemplate sewing.
But I really want to do this. I tried when I was a teenager but the lesson lasted about 15 minutes before my mother and I became frustrated and I gave up. But this time, I am determined to conquer this skill!
I laid out my material and pinned the pattern on.

I even had my cute little pin cushion.

My biggest fear was laying out the pattern on the fabric and cutting it out. Once you cut it out, you're committed, ya know? But I got it all laid out properly and commenced with the scissors.

I ran into a few bumps when I started putting it all together though. I ripped out almost every seam I sewed. But I felt like I finally had it under control. I had the inner legs sewn and then did my fast runs down the leg side seams. Yay!
The next step was the waist. The idea is that you roll down the top of the material, press it with an iron, sew it and then run elastic through it to make an elastic waist.
But when I started to turn down the material, I noticed there might be a problem.

Yep, that's a whopping inch and a half for my daughter's booty. Them's some supa low riders for my baby girl!
I cannot stop laughing!!
I recently purchased a used sewing machine. I then ventured into the fabric store and picked up a cute pajama pattern as well as material for the kids.
You need to understand that sewing scares the .... the... the.... well, it scares the poop outta me. It's very intimidating. I'm not good at spacial relations. It's really hard for me to layout the pattern and then match up the pieces. Add to that the pressure of descending from amazing seamstresses and you'll see me on the verge of a panic attack as I contemplate sewing.
But I really want to do this. I tried when I was a teenager but the lesson lasted about 15 minutes before my mother and I became frustrated and I gave up. But this time, I am determined to conquer this skill!
I laid out my material and pinned the pattern on.

I even had my cute little pin cushion.

My biggest fear was laying out the pattern on the fabric and cutting it out. Once you cut it out, you're committed, ya know? But I got it all laid out properly and commenced with the scissors.

I ran into a few bumps when I started putting it all together though. I ripped out almost every seam I sewed. But I felt like I finally had it under control. I had the inner legs sewn and then did my fast runs down the leg side seams. Yay!
The next step was the waist. The idea is that you roll down the top of the material, press it with an iron, sew it and then run elastic through it to make an elastic waist.
But when I started to turn down the material, I noticed there might be a problem.

Yep, that's a whopping inch and a half for my daughter's booty. Them's some supa low riders for my baby girl!
I cannot stop laughing!!
Subscribe to:
Posts (Atom)


